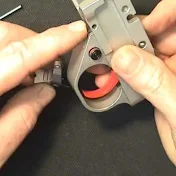
KIDD Trigger "Job Kit" installation in the polymer or plastic 10/22® factory guard
81.9 هزار بار بازدید -
11 سال پیش
-
Tony Kidd of KIDD Innovative
Tony Kidd of KIDD Innovative Design explains the proper process for installing our KIDD "Trigger Job" Kit with hammer, sear, disconnect and trigger blade in a Ruger® 10/22® polymer trigger guard. View the product at the following link:
http://www.coolguyguns.com/KIDD-Trigg...
Our kit comes with the following internal replacement parts including a wire EDM tool steel hammer, sear, and disconnect along with and aluminum trigger blade all made at KIDD Innovative Design. We affix the bushings on either side of the hammer for a rigid attachment. The hammer pin that is included in the kit is fitted to the precise hammer pin hole and should be the only one used when assembling. We also construct a sub assembly with the sear, disconnect, spring and trigger blade held together with a slave pin for ease of installation. This sub-assembly also comes with a specific pin provided that should be used during assembly.
Disassemble your trigger:
In order to install the KIDD "trigger job" kit first the trigger unit must be disassembled. Remove all internal parts except the safety.
Installing the KIDD "Trigger Job" Kit in the trigger guard:
With the polymer trigger guard in hand drop in the sear, disconnect, trigger blade sub-assembly into the trigger guard while installing the return spring. KIDD offers a Pull Weight Tuning Kit (link: http://www.coolguyguns.com/KIDD-Pull-...) that has 5 incrementally tensioned springs for tuning your trigger pull. With the trigger return spring in slide in the trigger pin. (Assembly note: if you hold onto the slave pin from the subassembly then life could be made easier if disassembly is required). Now onto the magazine catch and magazine release assembly, push in the spring loaded magazine catch into the trigger guard while holding that compressed install the magazine release aligning the head on the magazine release with the slot in the magazine catch/plunger then slide the magazine release pin through the trigger guard to hold in place. The upgraded auto bolt release (ABR) (link: http://www.coolguyguns.com/KIDD-Auto-...) or the bolt hold open also pivots on the magazine release pin, so from the top down put in your ABR and capture it with the same pin.
To install the hammer place the ABR spring or torsion spring on the right side boss of the hammer bushing with the dog leg of the spring on the bottom. With the safety off to allow for give in the sear, pivot the ABR up and align the hammer pin hole sliding the pin through the hole leading with the tapered end first. Pivot the ABR spring down fitting the dog leg of the spring into the notch in the ABR, compress the non dog leg of the spring into the trigger guard then push the ejector spring through to capture the spring. Install the ejector by slightly pushing out the newly installed pin allowing for clearance for the pin hole of the ejector to be captured, then slide the pin back through the ejector hole. At this point check to make sure that the ABR has spring and returns after pressing it. To install the hammer strut assembly lift the hammer forward creating an obtuse angle. Place the hammer strut assembly keeper side into the rear of the trigger guard then slide the head into the slot cut in the back of the hammer. Note that we recommend aligning the slot cut in the keeper of the hammer strut assembly up (12 o'clock) when placing it inside the trigger guard. After getting the assembly in the slot of the hammer pivot the hammer back to cock the trigger. If the hammer resistance is too great then further slide the hammer strut assembly down the slot in the back of the hammer. After the hammer is cocked dry fire it to make sure that it functions properly. When dry firing the trigger assembly be sure to grasp the trigger guard with your non shooting hand leaving just a small amount of clearance over the hammer so that when the trigger is pulled the hammer will release but not gain too much speed so that the testing becomes painful for your non shooting hand.
Now that the initial installation is complete we will check for proper tuning of the kit in your trigger guard. There is generally very little tuning required but for those of you that may need a little tuning Tony goes over some of the adjustments. For more information see our websites at http://www.coolguyguns.com/ and http://www.kiddinnovativedesign.com/
11 سال پیش
در تاریخ 1392/05/27 منتشر شده
است.
81,988
بـار بازدید شده