How to fix Huawei P30 won't charge - Motherboard Repair
10.3 هزار بار بازدید -
پارسال
-
Hello, this is Leonardo, your
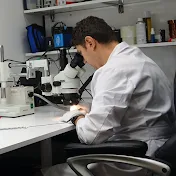
Hello, this is Leonardo, your seasoned electronic professional, bringing you an insightful tutorial on a rather rare issue concerning the Huawei P30 Pro. The device in question is not charging, and the problem appears to be originating from the motherboard.
Kicking off without delay, we swiftly disassemble the device. Time, after all, is a commodity we can't afford to waste. Following the swift disassembly, we turn our attention to the intermediate casing and the NFC antenna, removing all their screws. A crucial tip to remember is to disconnect the battery connector before disconnecting any flexes to prevent potential short circuits on the motherboard.
A meticulous visual inspection is vital at this stage, as we can see that there are some missing components just above the battery connector. Also, we spot a damaged pad that needs reconstruction. We use the ZXW Tool to ascertain what components have been lost. Luckily, with the variety of tools we have at our disposal, motherboard repairs are quite straightforward.
We quickly identify that two resistors and a capacitor are missing. If you've followed our mini-course, you would know that without these resistors, the phone will fail to charge. However, even without the capacitor, the mobile should turn on.
As we don't have a Huawei P30 Pro motherboard at our lab, we will recycle these components from a Huawei P20 Pro board. It's essential to ensure that the recycled components have the same value. This problem seems to stem from improper handling, emphasizing the importance of having quality tools at hand.
🟨 Multimeter Testers:
https://s.click.aliexpress.com/e/_DkG...
https://s.click.aliexpress.com/e/_Dn5...
https://s.click.aliexpress.com/e/_Dcy...
https://s.click.aliexpress.com/e/_DDI...
https://s.click.aliexpress.com/e/_Dek...
https://s.click.aliexpress.com/e/_DDM...
Next, we set about recovering the pad by gently scraping the top layer with a surgical scalpel. Thorough cleaning is crucial throughout the process, for which we use a piece of cotton and contact cleaner.
After placing the first recycled component in position and applying solder paste, we solder it at 350ºC and 10% air. It's important to apply minimal air at the soldering station for small components to prevent them from moving. We then check with an antistatic tweezer to see if the component has been properly soldered. We also use a multimeter in diode mode to check the component's impedance, indicating a successful soldering.
The next task is to recover the lost pad. We apply some solder paste and heat the area with a hot air station. I hope you're finding this content valuable. Your likes and support mean a lot to me!
The process then involves placing and soldering the second resistor, followed by checking the soldering with the multimeter. A clean work environment is essential to the success of the process, and so we ensure to prevent rust on the motherboard.
After mounting the motherboard on the device, we perform necessary checks and see the charging icon appear on the screen, indicating that the device's battery is completely discharged. After waiting for a few minutes, we observe a correct charge on the Power-Z tool. As we conclude the process, the device powers up correctly, indicating that we have successfully addressed the issue.
I am Leonardo, your electronic professional, bringing you step-by-step guides to help you tackle any electronic challenges you may encounter. Looking forward to seeing you in our next session. Take care!
You Can Be Membership Here
moviloneesgranada
پارسال
در تاریخ 1402/05/06 منتشر شده
است.
10,360
بـار بازدید شده