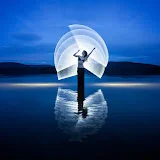
Experimenting with bullet-time software for Raspberry Pi cameras
50.4 هزار بار بازدید -
4 سال پیش
-
Created using Xangle Camera Server:
Created using Xangle Camera Server: https://xangleCS.com/
Related blog post & additional images: https://www.xanglecs.com/blog/bullet-time-photography-using-raspberry-pi-cameras
We started to work on a PiCam version of our multi-camera software a few months ago, but that had nothing to do with our usual bullet-time work. It was mostly about photogrammetry, which should look like our DSLR system, with much smaller cameras. And that part is ready.
But as we had the equipment and the software I got interested to see how far we could push it with bullet-time and what kind of image quality I could get out of these tiny cameras. My main interest here is the size of them as they can be put super close to each other, giving me my best density ever on a multi-camera structure
Now just as with our Android or DSLR edition, this works with a dashboard to change the camera settings and output settings. We also have our usual instant playback player, our gallery, and tons of modules.
On the first iteration of the kit, I couldn't get a good calibration as the PiCam lenses are mounted on a thermal paste and can't be placed with precision. This is what I got from this first kit. It is quite shaky. The problem is that these are very wide lenses, and with the distortion, I really need to have all of the cameras to look at the same center spot. But as I got more hooked about the end results I was getting, we tried to see if we could get rid of that paste to stick the lenses directly to the small boards. It's not perfect, but it's getting close. This is my actual kit!
For all of my tests using continuous light, I'm using 15 PiCam on 15 Raspberry Pis 3b+ with no custom electronic components. Each Pi is sending its data through ethernet cables to the switches to the laptop. My trigger is a simple bluetooth powerpoint presenter. But for my shots using an external strobe, we had to design a little PCB to send the signal to my speedlite. The board is on the last pi, and linked to the flash via an audio cable and a hot shoe adapter. Any kind of flash can work for this.
The Picams board are mounted on laser cut acrylic plates which connect to an extruded aluminum bar via these 3d printed adapters. Each
I did this project as a cool experimentation, and this is never going to replace my DSLRs, but this is opening the door to different ways of using this technology, and yes, it is compatible with the new PiCam HQ, and that looks very promising. I'll play with that next week!
https://instagram.com/theXangle
https://instagram.com/ericparephoto
4 سال پیش
در تاریخ 1399/06/31 منتشر شده
است.
50,424
بـار بازدید شده