❣DIY Fairy Garden Mushroom Gnomes❣
452.7 هزار بار بازدید -
8 سال پیش
-
DIY Fairy Garden Mushroom Gnomes
DIY Fairy Garden Mushroom Gnomes
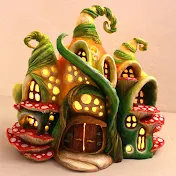
In this video tutorial I show you how to make some funny garden gnomes using jars, tin foil, hot glue, paper clay and watercolors. It’s fun to make and you can use it as candy jar for a candy bar, birthday party, thank you gift for a baby shower, baby room decoration, piggy bank, jewelry box, cookie jar and so on.
So you need an empty jar with lid, aluminum foil, paper clay (I used "Das modelling material" you can use any paper clay or even a homemade paper clay - I have a video about that - ❣How To Make STRONG Air Dry Paper Cla... ) hot glue and water colors. (A lot of you asked me if you can use polymer clay on this kind of projects. Of course you can use polymer clay but for bigger jars like the ones I used in this video you will have to use a lot of polymer clay and the whole project will become expensive. You will be able to save a lot of material using thin foil but still, I would recommend you to use paper clay.) Choose some jars and clean them with hot water and soap. Start shaping some tinfoil into your gnome’s hat. Cover it with tinfoil and integrate the lid at the bottom. You can add multiple layers of foil until you get the desired result. Glue the tinfoil cap to the jar’s lid using hot glue. Cover the tinfoil shape with a layer of clay and smooth it using water. I made the mushroom dots in clay this time so they give a nice texture to the gnome’s hat. Cover the jar with clay and start working on the face of your gnome. Make sure you make the face big enough so you get a nice proportion between the hat and the head of the gnome. Let everything dry. Apply another layer of clay to create textures and details if you feel like it. If the clay doesn’t stick to the previous layer I recommend you to water the areas you want to work on. Also keep a water container near by to wet your hands and working utensils when they get sticky. Use water to achieve smooth and shiny surfaces. Paint your gnomes in the desired colors. For most of the gnome I used watercolors but for some details I used watercolor pencils. If you use watercolors for this step I recommend you seal them in the end with varnish or regular hair spray.
-------------------------------------------------------------------------------------------------------
Tools & Materials:
Das modelling material - http://amzn.to/2r5FEHY
Tin foil - http://amzn.to/2sOcY7K
Watercolors - http://amzn.to/2rcBmTi
Acrylic paint - http://amzn.to/2s8KaIZ
Lights - http://amzn.to/2t1oRqQ
Hot gun - http://amzn.to/2sO7EkF
Fruit carving knife - http://amzn.to/2seNzqP
DISCLAIMER: These are affiliate links, which means that if you click on one of the product links and buy something, I’ll receive a small commission with no additional cost to you. This help support the channel and allows me to continue to make videos like this. Thank you for the support!
-------------------------------------------------------------------------------------------------------
Popular Videos:
DIY Smurfs Mushroom House Jar - ❣DIY Smurfs Mushroom House Jar❣
DIY Mushroom Fairy House Jars - ❣DIY Miniature Mushroom Fairy House J...
Plastic Bottles Recycling Craft Idea - DIY Fairy House ❣Plastic Bottles Recycling Craft Idea...
How to make an AWESOME Fairy Tree House ❣DIY Fairy Tree House❣
-------------------------------------------------------------------------------------------------------
So like, comment and subscribe to my channel for more videos
https://www.seevid.ir/c/CreativeMom...
Connect with me on Facebook and Twitter
Facebook: CreativeMother
Twitter: DiaCreativeMom
Let me know what you think in the comment section below.
Thank you!
8 سال پیش
در تاریخ 1395/04/26 منتشر شده
است.
452,796
بـار بازدید شده